Posted in:
Magento 2 Tutorials
Magento 2 New Relic Reporting
In this blog, we will get guidance about New Relic Reporting.
Have you read our previous blog? Not yet, Read now - How to configure WYSIWYG Component in Magento 2? Share it with your friends and co-workers.
New Relic is a software analytics service that allows you to analyze and optimize the interactions between your applications. The New Relic APM service software includes Adobe Commerce cloud infrastructure accounts. Let's look at our developer documentation for additional information on New Relic Services.
Go to the New Relic website and create an account to get started. You may sample New Relic for 60 days without paying anything.
Steps for configuring Magento 2 New Relic Reporting:
- Step 1: Login with your Admin panel
- Step 2: Select the STORES option from the sidebar
- Step 3: Then go to the next step, Settings > Configuration
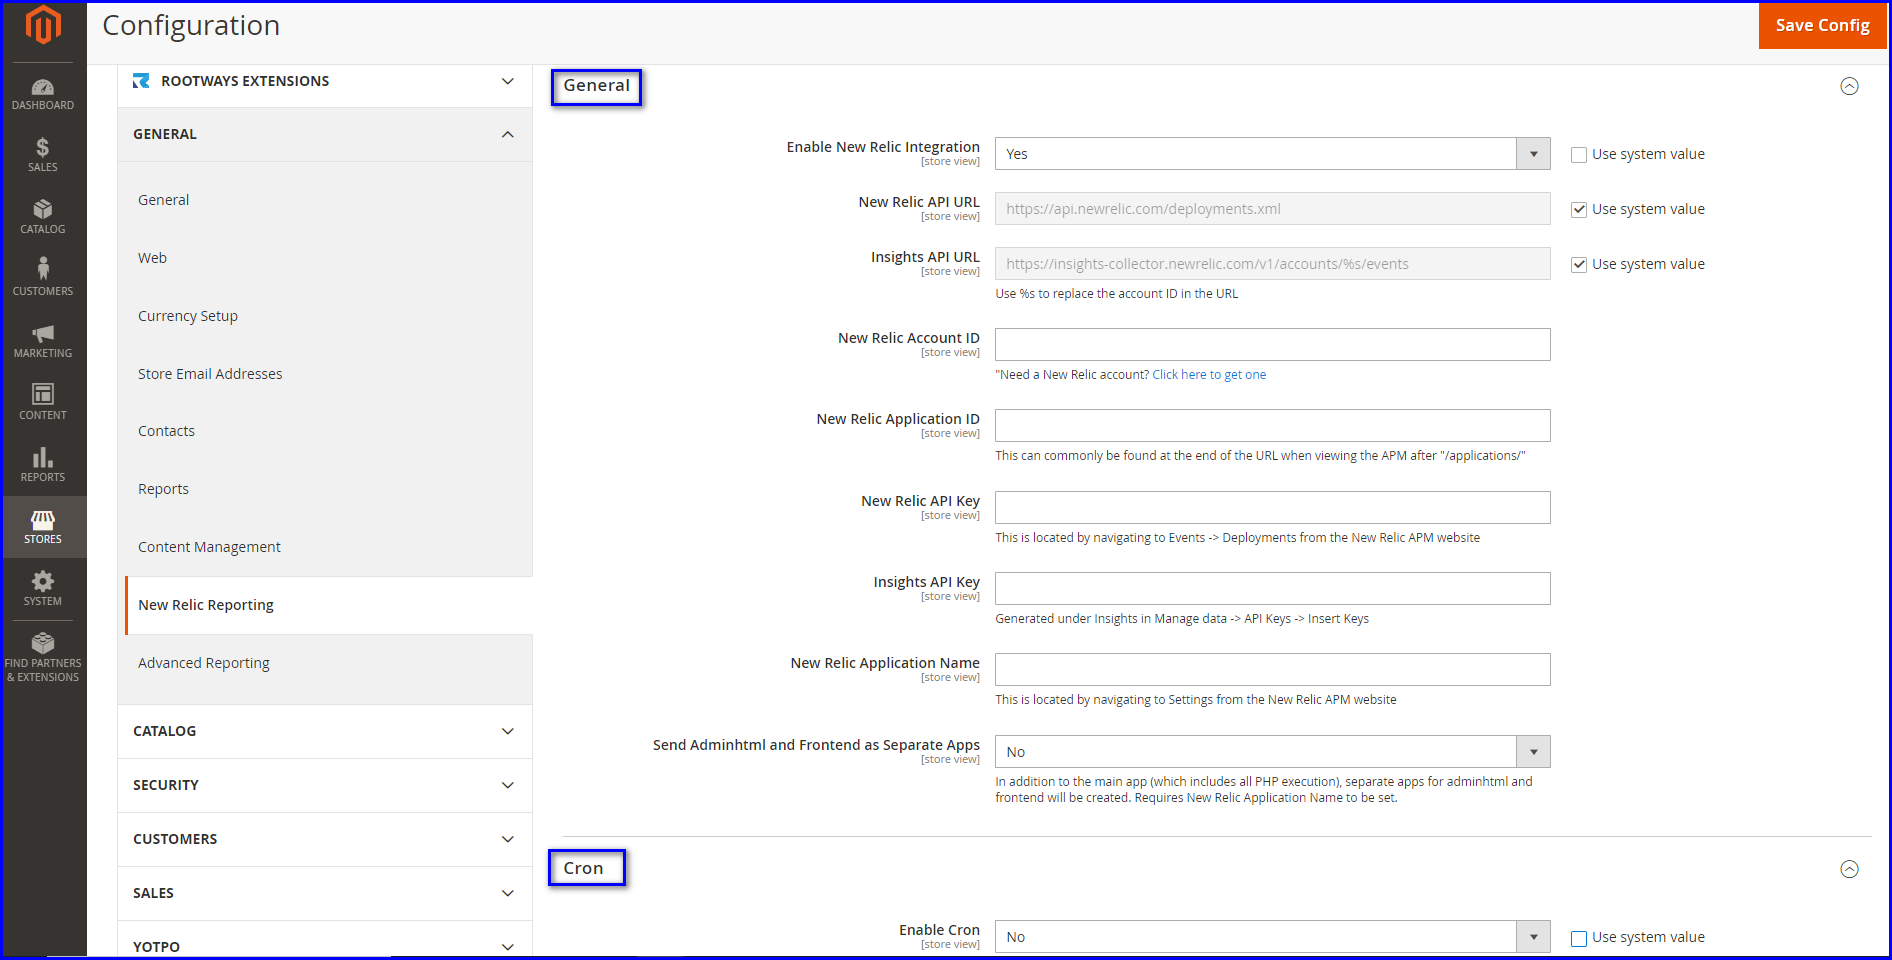
- Step 4: Then expand the General tab and then click on the Store New Relic Reporting
- Step 5: Expand General Option Set Enable New Relic Integration to Yes.
- Step 6: Insights API URL: Change the percent (%) with your New Relic Account ID
- Step 7: Fill up your New Relic Account ID
- Step 8: Fill up your New Relic Application ID
- Step 9: Fill up your New Relic API Key
- Step 10: Fill up your Insights API Key
- Step 11: New Relic Application Name field: Set the name to identify the configuration for internal reference.
- Step 12: Send Adminhtml and Frontend as Separate Apps: Select Yes to send collected data for the storefront and Admin as separate apps to New Relic.
- Step 13: Expand the Cron Option. Set Enable Cron to Yes.
- Step 14: If you are done with this configuration, click on the Save Config button.
April 9, 2022
Did you like this post?