Manage Product Listings page from the Admin
This article will provide information on the Manage Product Listings page from the Admin.
Have you read our previous blog post? Not yet, Read now: How to Set Product Fields Auto-Generation in Magento 2? Also, share it with your friends and co-workers.
Listings of Products
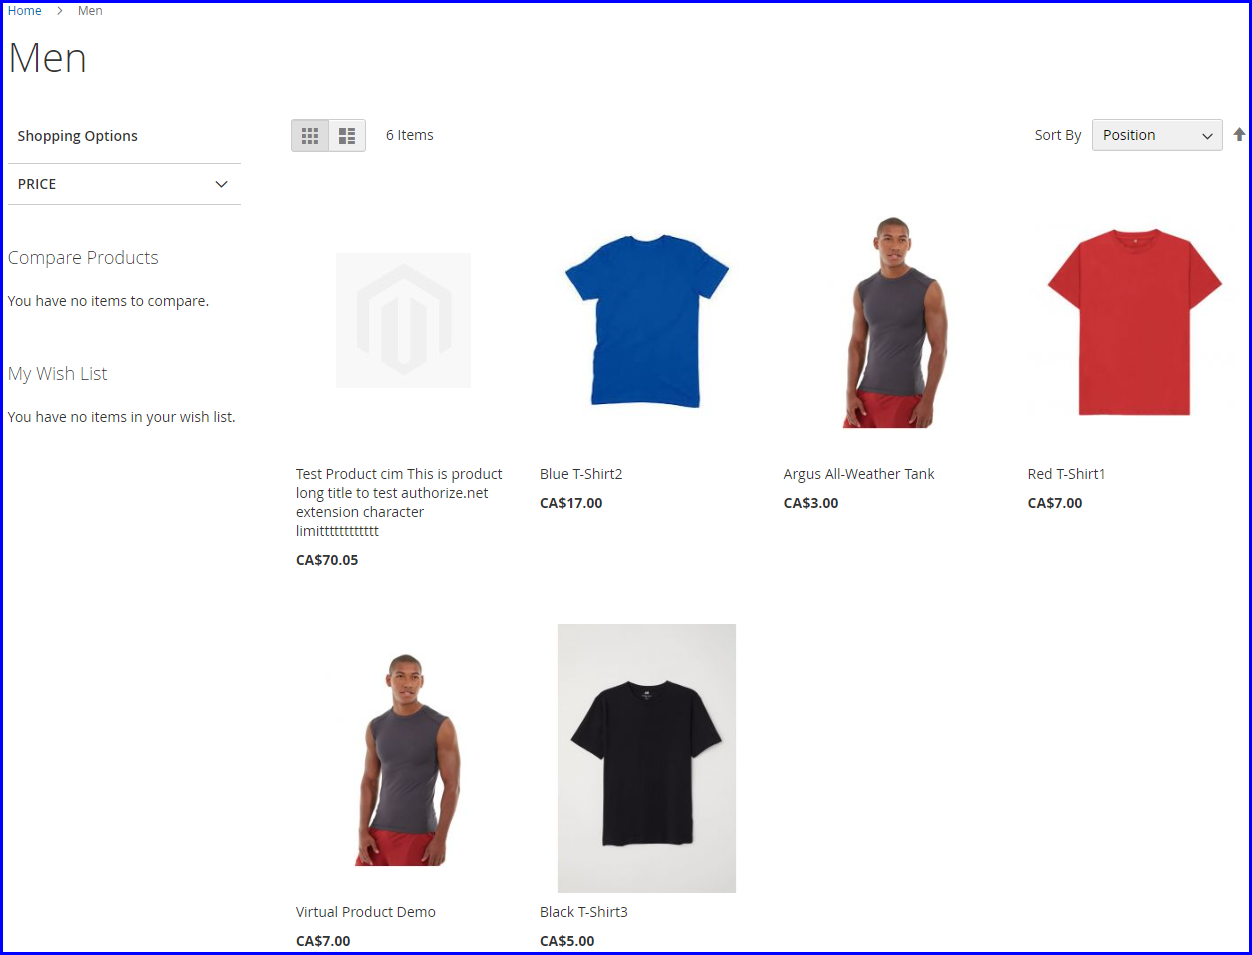
Product listings can be adjusted to show as a list or grid by default. You may also specify how many goods display on each page and which characteristic is used to rank the list. In addition, each catalogue page containing a product list has a set of options for sorting the products, changing the format of the list, sorting by attribute, and moving from one page to the next.
Steps for Magento Product Listings page from the Admin:
- Step 1: Login with your Admin panel
- Step 2: Now, go to the sidebar and click on the STORES option.
- Step 3: Go to the Settings > Configuration
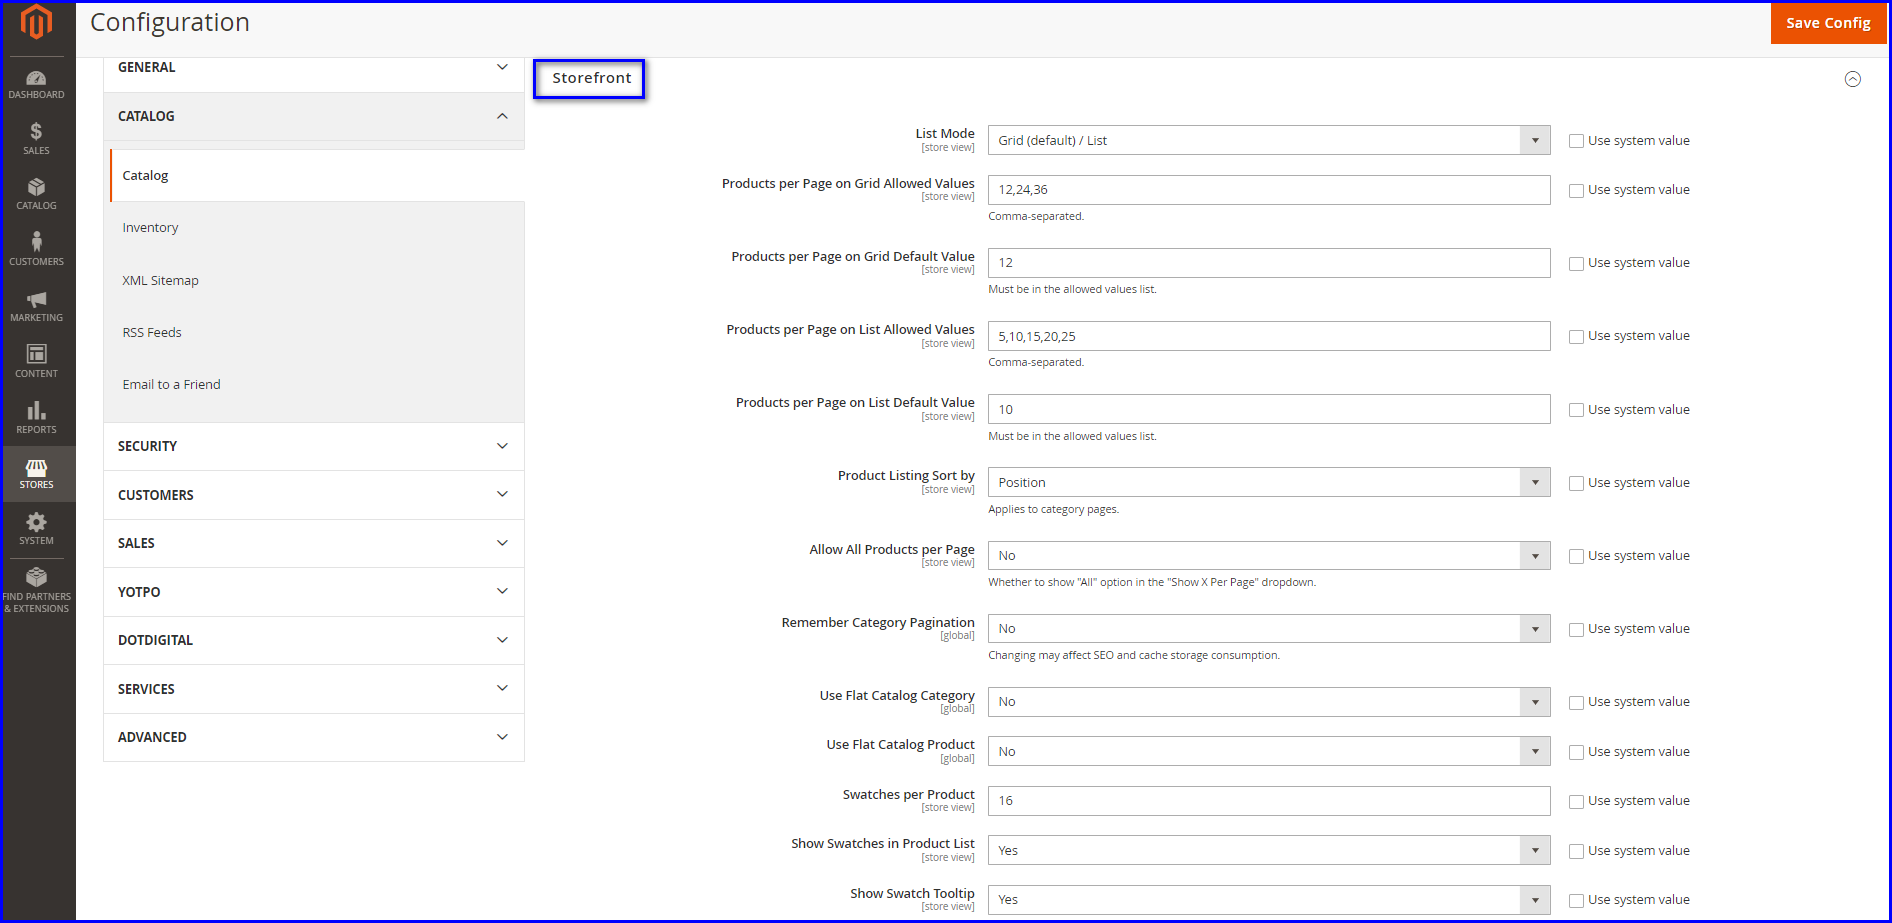
- Step 4: Select the CATALOG tab to click on the catalog and expand the Storefront section.
- Step 5: Set the default List Mode to one of the options below:
- Grid Only - The list is formatted as a grid of rows and columns. Each product is represented by a single grid cell.
- List Only - Formats the list such that each product is on its separate row.
- Grid (default / List) - By default, Products are shown in the Grid view and can be toggled to the List view.
- List (default / Grid) - By default, Products are displayed in List View and can be toggled to Grid view.
- Step 6: Products per Page on Grid Allowed Values - Enter the number of products you want to appear on each page when shown in a grid format. To enter a list of values, use a comma to separate each number.
- Step 7: Products per Page on Grid Default Value - Determines the number of products displayed on each page in Grid View by default.
- Step 8: Products per Page on List Allowed Values - Enter the number of products you want to appear on each page when shown in a list format. To enter a list of values, use a comma to separate each number.
- Step 9: Products per page on List Default Value - Determines the number of products displayed on each page in List View by default.
- Step 10: Product Listing Sort by - The default attribute initially used to sort the list.
- Step 11: Allow All Products on Page - Set Allow All Products on Page to Yes to provide customers with the option of listing all products.
- Step 12: Remember Category Pagination - Clear the Use system value option if you want to keep all pagination settings while clients navigate through catalogue listings. Then, set Remember Category Pagination to Yes.
- Step 13: Use Flat Catalog Category - Set Use Flat Catalog Category to Yes to display a product listing by flat category.
- Step 14: Use Flat Catalog Product - This allows for a flat product structure. (This is not advised) Yes/No options
- Step 15: Swatches per Product - Determines how many swatches are provided for each product. 16 is the default.
- Step 16: Show Swatches in Product List - Determines whether or not the swatches display in the Product List. Yes/No options
- Step 17: Show Swatch Tooltip - Determines whether or not the swatch tooltip shows. Yes/No options
- Step 18: If you are done with this configuration, click on the Save Config button.
Enabling this option ensures that the number of products displayed in a list or grid remains constant when buyers navigate from one category to the next. This field is set to No by default since it uses more cache storage and can affect how search engines index pages.