
How to Setup Catalog Search Engine in Magento 2
One way to make it easier for your consumers to use the product search form to find products is to configure the product Catalog search in Magento 2.
With the help of the Layered navigation and the Magento 2 catalog search, you can give clients an outstanding shopping experience while giving them access to the adaptable and user-friendly Magento 2 product catalog navigation.
The most comfortable and popular way to navigate a catalog is to utilize the search field, which only requires you to type a word or phrase to find the desired item.
Additionally, those who find a product using the search form are more likely to buy it.
As a result, we will discuss the various catalog search options in Magento 2 in this article.
Let's dive in.
Configuring Catalog Search
The Catalog Search setup comes in two forms: When Live Search is installed, the first method provides the available options, and the second way describes the setup options for native Adobe Commerce with Elasticsearch.
Method 1: Adobe Commerce with Live Search
- Go to Stores Settings Configuration on the Admin sidebar.
- Expand the Catalog section on the left side, then click Catalog there.
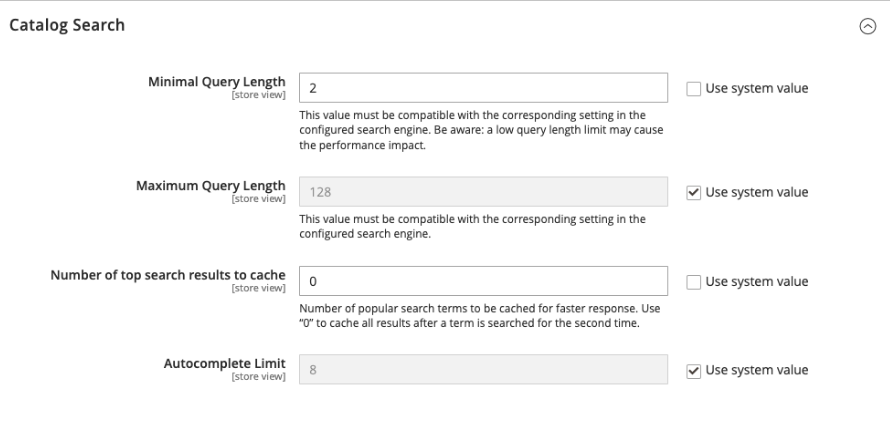
- Extend the Catalog Search section.
- Set a value for Minimal Query LengthMaximum Query Length to restrict the length and word count of the search query text.
- Set a value for the Number of top search results to cache to restrict the number of popular search results to cache for quicker responses. 100 is the default value. When a value of 0 is entered, all search words and results are cached for later entry.
- Enter a different Autocomplete Limit value to alter the maximum number of lines that can be displayed for returned results in the storefront popover. Limiting the number of lines enhances the search efficiency and shrinks the size of the returned list. The 8 lines setting is the default.
Method 2: Adobe Commerce with Elasticsearch
Step 1: Configure general search options.
There is no out-of-the-box support for searching by the suffix with ElasticSearch. For instance, if the keyword only comprises the final portion of the SKU, a search by SKU could not produce the desired results.
- Go to Stores Configuration at the Admin sidebar.
- Expand the Catalog section on the left side, then click Catalog there.
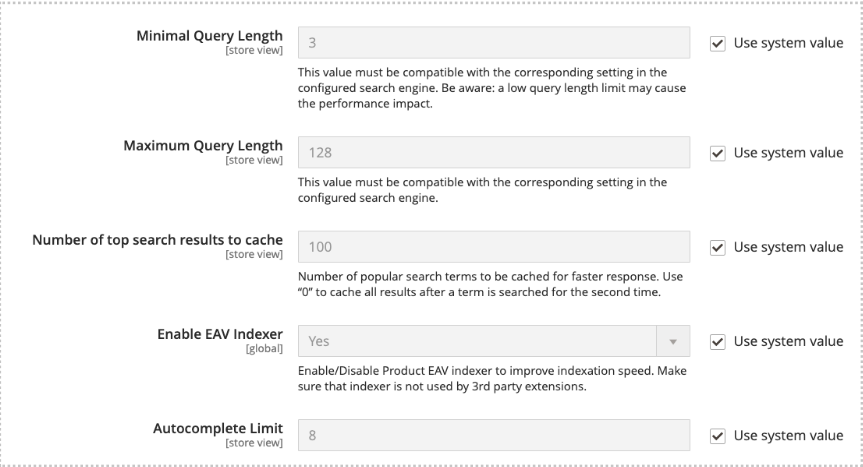
- Extend the section for catalog search.
- Set a value for Minimal Query Length and Maximum Query Length to restrict the length and word count of the search query text.Important:The minimum and maximum values entered here must align with the corresponding ranges entered in the Elasticsearch search engine configuration. E.g., Update the equivalent values in your search engine if you set these values in Commerce to 2 and 300.
- Set a number for the Number of top search results to cache to restrict the number of popular search results to cache for quicker responses.100 is the default value. When a value of 0 is entered, all search words and results are cached for later entry.
- Set the Enable EAV Indexer option if you wish to enable or disable the Product EAV indexer.
This feature increases indexation speed and prevents third-party extensions from using the indexer. - Set a figure for Autocomplete Limit to restrict the maximum number of search results displayed for search autocomplete.
Limiting this quantity improves search performance and minimizes the size of the displayed list. The standard setting is 8.
Step 2: Configure the Elasticsearch connection
When Commerce was installed or upgraded, the following values were set: Search EngineElasticsearch Server Hostname Elasticsearch Server PortElasticsearch Index PrefixEnable Elasticsearch HTTP Auth, and Elasticsearch Server Timeout. Only when Elasticsearch is being upgraded or modified should these values be altered.
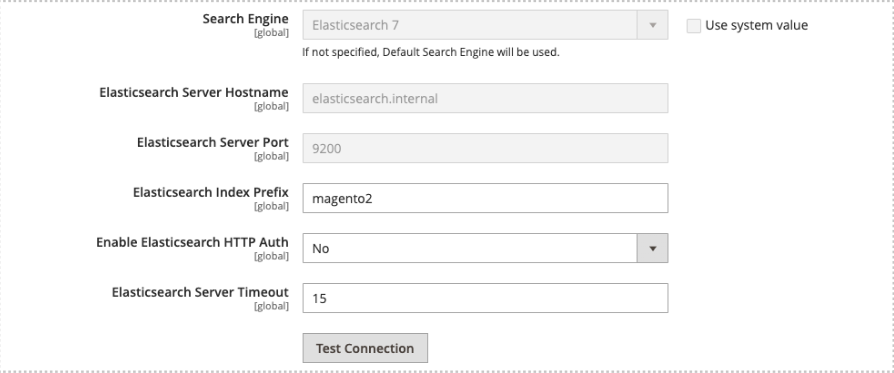
- Accept the default value of Elasticsearch 7 for the Search Engine.
All Commerce implementations require Elasticsearch 7.6.x. - Accept the default setting for the Elasticsearch Server Hostname established when Commerce was installed.
We use "elasticsearch.internal" as the default value in this example. - Accept the default setting for the Elasticsearch Server Port that was set during the installation of Commerce.
The default value in this instance is 9200. - To specify the Elasticsearch index, provide a prefix in the "Elasticsearch Index Prefix" section.
Magento 2 is the default selection. - Set value 'Yes' in section Enable Elasticsearch HTTP Auth to enable HTTP authentication, which will ask for a password and username before giving access to Elasticsearch Server.
- Enter the number of seconds until the system times out under Elasticsearch Server Timeout.
15 is the default value. - Click Test Connection to confirm the configuration.
Step 3: Configure recommendations and suggestions
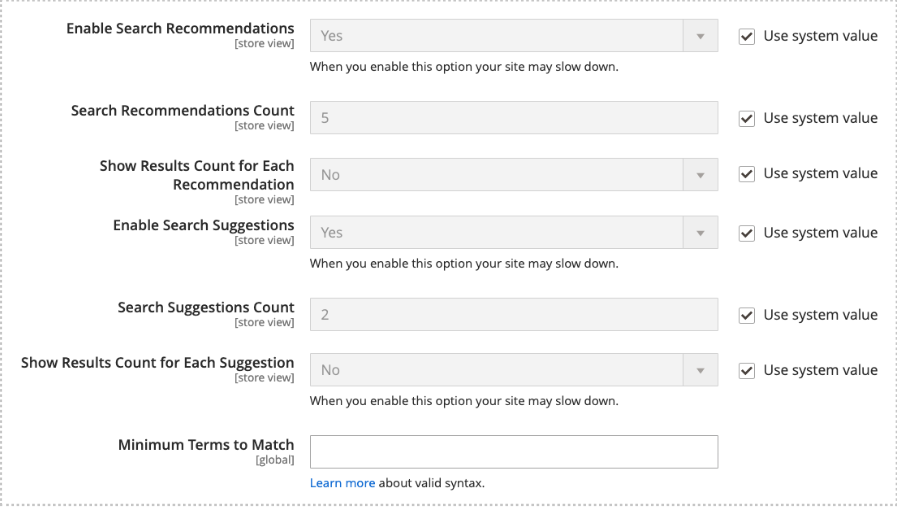
Server performance may be affected by search suggestions and recommendations.
- Set Enable Search Recommendations to Yes to provide recommendations and take the following actions:
- Enter the desired number of recommendations under Search Recommendation Count.
- Set Show Results Count for Each Recommendation to Yes to display the total number of results discovered for each recommendation.
- Set Enable Search Recommendations to Yes to provide recommendations and take the following actions:
- Enter the desired number of recommendations under Search Recommendation Count.
- Set Show Results for Each Suggestion to Yes to display the total number of results for each suggestion.
Step 4: Configure Minimum Terms to Match
Set a value for Minimum Terms to Match to decide how many terms from your query must match for the search results to be returned. It guarantees the best results for customers. See the minimum_should_match parameter in the Elasticsearch documentation for a list of acceptable values.
After finishing, click Save Config.