Posted in:
Magento 2 Tutorials
How to set Default Category Layout in Magento 2
Sometimes you need to change the layout or design for the category, while other categories continue in Magento 2. Or sometimes, you need to temporarily alter the design for some specific category in Magento 2.
In this blog, you know more about how to set the default category layout in Magento 2 with step-by-step information.
Steps for the set Default Category Layout:
- Step 1: Login with your Admin panel
- Step 2: Go on the sidebar and click on the Stores option
- Step 3: Then go on the Settings > Configuration
- Step 4: Then expand the General tab and then click on the Web option
- Step 5: Then select the Default Layouts section
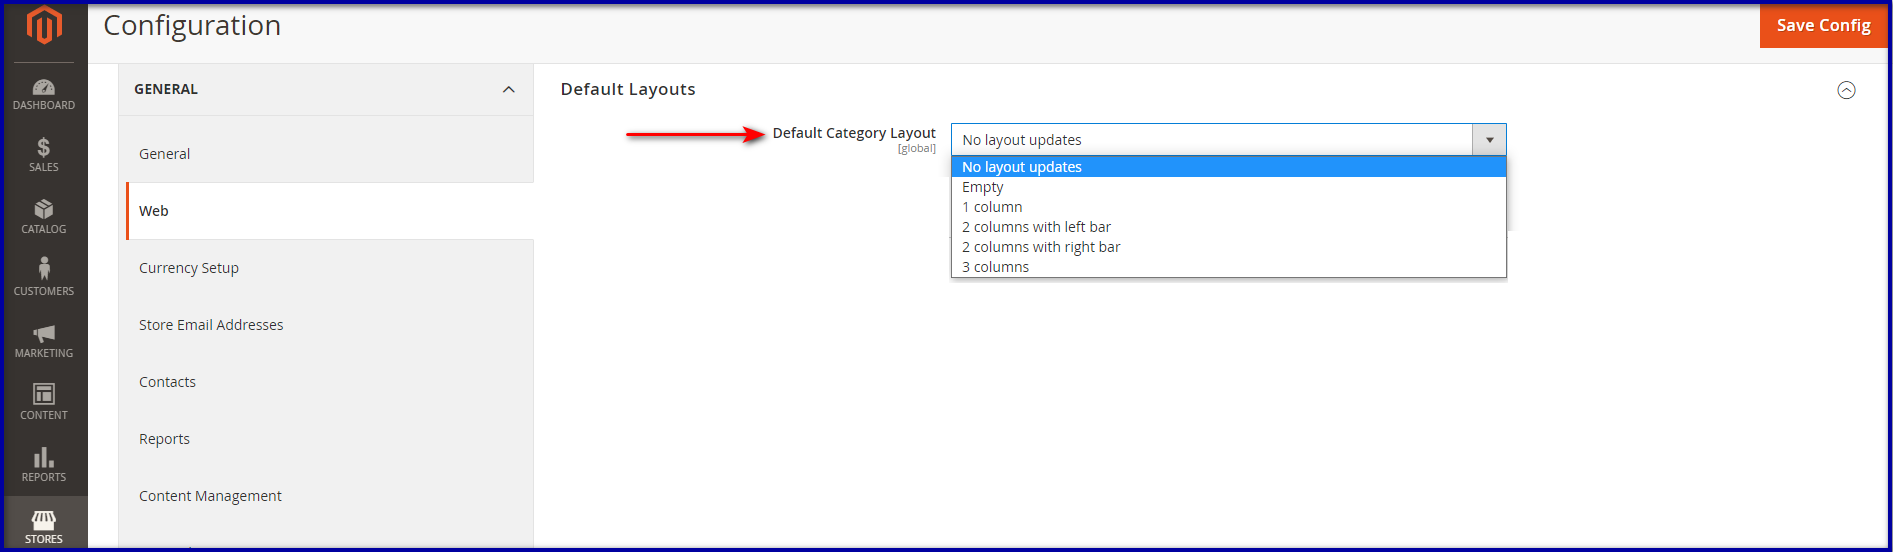
- Step 6: Then go on the Default Category Layout field
In that field select the default category layout that you want to set for category page - No layout updates: Layout updates are not available for category pages.
- Empty: Uses a blank layout for category pages.
- 1 column: Uses a single column layout for category pages.
- 2 columns with left bar: Uses a two-column layout with the sidebar on the left for category pages.
- 2 columns with right bar: Uses a two-column layout with the sidebar on the right for category pages.
- 3 columns: Uses a three-column layout with sidebars on the left and right for category pages.
- Step 7: If you are done with these configuration then click on the Save Config button.
October 4, 2021
Did you like this post?